Adding a polished chrome modern vanity light can instantly refresh your bathroom’s look and feel. It’s a straightforward upgrade that brings a contemporary sparkle and improved illumination, making your daily routines more pleasant. This article will guide you through why and how to choose and install one, ensuring you get the most out of your new fixture.
Polished chrome has been a long-standing favorite in bathroom design, and for good reason. It offers a unique blend of style and practicality that few other finishes can match, especially when you’re aiming for a modern aesthetic.
The Allure of a Reflective Finish
Think of polished chrome as the jewelry of your bathroom. Its highly reflective surface acts like a subtle mirror, bouncing light Kotile around the room. This isn’t just about looking good; it actually helps to brighten up a potentially dark space, making your bathroom feel more expansive and inviting. Unlike matte finishes that absorb light, polished chrome actively participates in illuminating your vanity area, which is crucial for tasks like shaving or applying makeup.
What makes it so appealing in a modern setting is its crisp, clean appearance. It doesn’t fight with other elements; instead, it blends seamlessly, offering a sophisticated sheen that complements minimalist designs. It’s not about being flashy, but rather about providing a refined, almost understated elegance.
Durability That Lasts
Let’s be practical: bathrooms are tough on fixtures. They’re humid, prone to splashes, and constantly in use. This is where polished chrome really shines. It’s not just a finish; it’s a plating process, usually over brass or steel, which makes it incredibly resistant to corrosion and tarnishing. Unlike some finishes that can pit or flake over time, well-maintained polished chrome will keep its luster for years. This durability translates to less maintenance for you and a longer lifespan for your investment. You won’t be constantly worrying about unsightly spots or having to replace a dull fixture prematurely.
Easy to Keep Clean
Nobody enjoys scrubbing. Polished chrome, despite its high shine, is surprisingly easy to maintain. A quick wipe down with a soft, damp cloth is usually all it takes to remove water spots and fingerprints. For a deeper clean, a mild soap solution and a microfiber cloth will restore its sparkle without the need for harsh chemicals that could damage the finish. Its smooth, non-porous surface doesn’t harbor grime, making it a hygienic choice for the bathroom. This ease of cleaning means your bathroom will consistently look fresh and updated with minimal effort.
What Exactly Makes a Vanity Light “Modern”?
When we talk about a “modern” vanity light, it’s not just a buzzword. It refers to a specific set of design principles that emphasize clean lines, simplicity, and often, innovative lighting technology.
Emphasis on Clean Lines and Geometric Shapes
Modern design shies away from elaborate ornamentation. Instead, it embraces simplicity and functionality. For vanity lights, this often translates to straight lines, sharp angles, and sometimes gentle curves that are purposeful rather than purely decorative. Think rectangular bars, circular bases, or sleek cylindrical shrouds. These geometric forms create a sense of order and calm, which is a hallmark of modern aesthetics. There’s no fussy detailing or intricate scrollwork; just a clean, uncluttered profile that lets the light itself, and the quality of the finish, take center stage.
Minimalist Aesthetic
A modern vanity light isn’t about being loud; it’s about making a statement through restraint. The minimalist approach means fewer distractions and a focus on essential elements. This can manifest as a single, powerful light source, or a series of identical units arranged symmetrically. The overall goal is to create a lighting fixture that integrates seamlessly into the bathroom’s decor without overwhelming it. It’s about quiet sophistication rather than opulent display. The beauty lies in its understated elegance and its ability to enhance the space without screaming for attention.
Integration of LED Technology
Modern lighting is almost synonymous with LED technology. This isn’t just a trend; it’s a practical evolution. LEDs offer superior energy efficiency, consuming significantly less power than traditional incandescent or fluorescent bulbs. This means lower electricity bills and a reduced environmental footprint. Beyond efficiency, LEDs provide excellent longevity, often lasting tens of thousands of hours, which means you won’t be changing bulbs frequently—a real convenience in hard-to-reach bathroom fixtures. They also offer a wider range of color temperatures, allowing you to choose between warm, inviting light or cool, crisp illumination to suit your preference and bathroom’s color scheme. Many modern fixtures even have integrated LED arrays, meaning the bulbs are built right into the fixture’s design, creating an even sleeker, more seamless look.
Choosing the Right Size and Style for Your Space
Selecting the perfect vanity light isn’t just about liking how it looks. It’s about making sure it fits your specific bathroom layout and complements your overall design.
Matching Fixture Width to Your Vanity
This is perhaps the most crucial practical consideration. The ideal width for your vanity light depends directly on the width of your vanity mirror or cabinet. Generally, the light fixture should be about 75% the width of your mirror. If your mirror is 30 inches wide, aim for a fixture around 22-24 inches. The idea is to have the light source concentrated over the area where you’ll be standing, ensuring even illumination across your face without harsh shadows. Going too wide can look disproportionate, while going too narrow means inadequate lighting, creating an unflattering spotlight effect. For double vanities, you might opt for two smaller, identical lights, one above each sink to provide individualized lighting for each person.
Considering Vertical vs. Horizontal Placement
Modern vanity lights come in two main configurations: horizontal bars mounted above the mirror, or vertical sconces mounted on either side.
Horizontal Bar Lights
These are popular for their ability to provide widespread, even illumination across the vanity area. A long, linear bar with multiple light sources is excellent for minimizing shadows, especially if it’s positioned correctly. They work well with wider mirrors and create a continuous line that reinforces the clean aesthetic of modern design. When choosing a horizontal bar, ensure it’s not too long for your mirror, as we discussed earlier. The light should ideally span across your reflection, not beyond it.
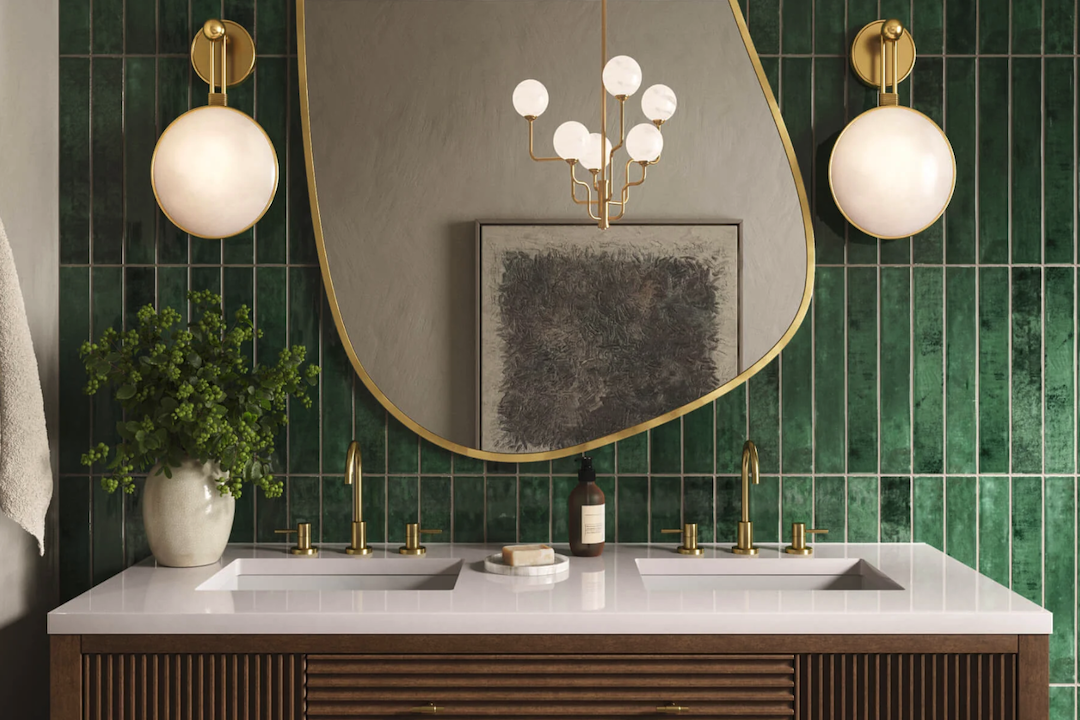
Vertical Sconces
Mounting lights on either side of the mirror at eye level (usually 60-65 inches from the floor to the center of the fixture) is generally considered the most flattering for illuminating the face. This flanking approach provides cross-illumination, virtually eliminating shadows under the chin, nose, and eyes. It’s a fantastic option for single vanities or if you have enough wall space on either side of your mirror. If your bathroom has a very wide mirror or a double vanity, using four vertical sconces (two per mirror/sink, or a pair on either side of the entire setup) can also create a stylish and well-lit effect.
Understanding Light Output and Color Temperature
Beyond the look, how the light performs is vital.
Lumens for Brightness
Forget about watts as a measure of brightness for modern LED fixtures. Instead, focus on lumens. Lumens indicate the actual amount of visible light emitted. For a vanity light, you’ll want sufficient lumens to adequately light your face for tasks. As a general guide, aim for at least 1500-2000 lumens total for a single vanity, distributed across the fixture. If you have other ambient lighting in the bathroom, you might need slightly less from the vanity light; if it’s the primary source, you’ll need more.
Kelvin for Color Temperature
Color temperature, measured in Kelvin (K), dictates the “warmth” or “coolness” of the light.
- Warm White (2700K-3000K): This mimics traditional incandescent bulbs, offering a cozy, inviting glow. It’s great for creating a spa-like atmosphere but might not be ideal for accurate makeup application.
- Cool White/Natural White (3500K-4000K): This is often considered the best choice for vanity lighting. It’s bright and clear, providing excellent visibility for tasks without being harsh. Colors appear more true-to-life under this temperature, which is critical for grooming.
- Daylight (5000K-6500K): This is a very bright, bluish-white light, similar to natural daylight at noon. While it provides maximum alertness, it can sometimes feel a bit stark or clinical in a bathroom setting and might not be the most flattering for skin tones.
For most modern bathrooms, especially for task lighting around a vanity, a color temperature in the 3500K-4000K range is usually a safe and effective bet.
Installation Considerations and Tips
While installing a light fixture might seem daunting, it’s a manageable DIY project for someone with basic electrical knowledge. However, if you’re unsure, always call a professional.
Safety First: Always Turn Off Power
This isn’t just a suggestion; it’s a non-negotiable safety rule. Before you touch any wiring, locate the circuit breaker for your bathroom and switch it off. It’s also a good idea to test the wires with a non-contact voltage tester to ensure no power is flowing. This step only takes a moment but can prevent serious injury. Don’t rush this part.
Tools You’ll Likely Need
Having the right tools makes the job smoother and safer. Here’s a basic list:
- Screwdrivers: Philips head and flathead for removing old fixtures and securing new ones.
- Wire Strippers/Cutters: For preparing electrical wires.
- Pliers: Needle-nose or lineman’s pliers can be helpful for bending and twisting wires.
- Voltage Tester: Absolutely essential to confirm power is off.
- Drill (optional): If you need to create new mounting holes or install wall anchors.
- Level: To ensure your new fixture is perfectly straight.
- Step Stool or Ladder: For reaching the electrical box.
- Electrical Tape: For securing connections.
- Wire Nuts: Typically included with new fixtures, but good to have spares.
- Safety Glasses: To protect your eyes.
Step-by-Step Installation Basics
While specific instructions will vary slightly by fixture, the general process is similar:
- Remove the Old Fixture: If replacing, carefully unscrew and detach the old light. Disconnect the wires, noting which color connects to which (usually black to black, white to white, and ground to ground).
- Mount the Mounting Plate: This is the metal bracket that attaches directly to the electrical box in your wall. Ensure it’s level and securely fastened.
- Wire the New Fixture: Following the manufacturer’s instructions, connect the wires of your new vanity light to the corresponding house wires. Typically, this means:
- Black (Hot) to Black (Hot)
- White (Neutral) to White (Neutral)
- Green or Bare Copper (Ground) to Green or Bare Copper (Ground)
Twist the wires together securely with wire nuts, then wrap with electrical tape for extra insulation. Gently tuck the wired connections back into the electrical box.
- Attach the Fixture Body: Carefully align the new light fixture with the mounting plate and secure it with the screws provided. Make sure it’s snug against the wall.
- Install Bulbs (if applicable): If your fixture doesn’t have integrated LEDs, screw in the recommended bulbs.
- Restore Power and Test: Flip the circuit breaker back on and test your new light.
If at any point you feel uncomfortable or unsure, don’t hesitate to call a qualified electrician. It’s always better to be safe than sorry.
Maintenance and Long-Term Care of Your Polished Chrome Fixture
Keeping your polished chrome vanity light sparkling is surprisingly easy and extends its life and aesthetic appeal. A little regular care goes a long way.
Regular Cleaning for Lasting Sparkle
The key to keeping polished chrome looking new is consistency. Don’t let grime build up, as it becomes harder to remove later.
Gentle Wiping
For everyday maintenance, a simple wipe-down with a soft, dry microfiber cloth is often all you need. This removes dust, fingerprints, and light water spots without scratching the surface. Make it a habit to do this once a week or whenever you notice smudges.
Mild Soap and Water Solution
For more persistent water spots or a deeper clean, mix a few drops of mild dish soap with warm water. Dampen a soft cloth with this solution and gently wipe down the chrome. Immediately follow with a clean, dry microfiber cloth to buff dry and prevent new water spots. Avoid abrasive sponges or harsh chemicals, which can scratch or dull the chrome finish over time.
Dealing with Tougher Spots
If you encounter stubborn hard water spots, a solution of equal parts white vinegar and water can be effective. Apply it with a soft cloth, let it sit for a minute or two, and then rinse thoroughly with clean water and dry immediately. Again, avoid extended soaking or using full-strength vinegar. For a truly mirror-like shine, some people use a tiny amount of car wax or baby oil on a clean, dry cloth after cleaning, buffing it to a high sheen. However, this is usually only necessary periodically.
Avoiding Harsh Chemicals and Abrasives
This point can’t be stressed enough. While chrome is durable, it’s not invincible.
Product Precautions
Steer clear of any cleaning products containing ammonia, bleach, abrasive powders, or acidic cleaners. These can strip the finish, cause discoloration, or even etch the chrome, leading to permanent damage. Always read the labels on your cleaning products.
Tool Precautions
Never use steel wool, abrasive scouring pads, or stiff brushes on polished chrome. These will inevitably scratch the surface, dulling its shine and potentially making it more susceptible to corrosion. Stick to soft cloths, sponges, or microfiber towels.
What to Do if Rust Spots Appear
While polished chrome is rust-resistant, it’s not entirely rust-proof, especially if the plating is damaged or if it’s exposed to harsh conditions for extended periods.
Early Intervention
If you notice tiny rust spots or pitting, act quickly. Often, these are surface rust marks from metallic particles (like steel wool fibers) rather than the chrome itself rusting.
Non-Abrasive Rust Removal
For small spots, try a paste made from baking soda and water. Apply it gently with a soft cloth, let it sit for a few minutes, then softly rub in small circles. Rinse and dry thoroughly. Another option is a chrome polish specifically designed for metal fixtures, applied according to the product’s instructions. If the rust is deeper, indicating a compromise in the chrome plating, it may be time to consider professional re-plating or replacement, as surface treatments will only offer a temporary fix.
By following these simple maintenance tips, your polished chrome modern vanity light will continue to be a stunning, functional centerpiece in your bathroom for many years to come.