Choosing the “best” stair sensor light isn’t about finding a single, universally perfect product. Instead, it’s about finding the right one for your stairs, blending safety with a look you’ll love. It means considering practicalities like how much light you need and how it’s powered, alongside aesthetic details that complement your home. Think of it as a smart upgrade that makes navigating your stairs easier and more inviting, especially in the dark.
Understanding Your Needs: The Foundation of Choice
Before you even start browsing, it’s really helpful to get a clear picture of what you’re trying to achieve with your stair lighting. This isn’t just about throwing some light on the problem; it’s about solving specific issues and enhancing your home’s feel.
Why Are You Installing Them? Safety First, Always
Let’s be honest, the primary driver for most people considering stair sensor lights is safety. Stairs, even familiar ones, can be a tripping hazard in low light. Sensor lights prevent fumbling for light switches or navigating in the dark.
- Preventing Falls: This is the big one. Good lighting helps you see each step clearly, minimizing missteps. Think about late-night trips to the bathroom or grabbing a drink from the kitchen.
- Navigating with Items: Carrying laundry baskets, a baby, or even just a cup of coffee up or down stairs becomes significantly safer when you don’t have to worry about finding a light switch or balancing in the dark.
- Children and Elderly: Homes with young children or elderly residents benefit immensely from automatic lighting. It reduces the risk for those who might struggle with depth perception or have slower reaction times.
Beyond Safety: The Style Factor
While safety is paramount, there’s no reason your practical lighting can’t also look good. Stair lighting can genuinely enhance the ambiance of your home.
- Ambiance and Mood: Well-placed, subtle lighting can create a warm, inviting glow, making your stairs feel less like a functional pathway and more like an integrated part of your living space.
- Highlighting Features: If you have beautiful railings, an interesting wall texture, or even just a particularly nice runner, lighting can draw attention to these elements.
- Modern Aesthetic: Many sensor lights now boast sleek, minimalist designs that can contribute to a contemporary or smart home aesthetic. They can be a subtle detail that speaks to thoughtful design.
Where Will They Go? Location, Location, Location
The exact placement and type of stairs you have will heavily influence your options.
- Straight Stairs: These are generally the easiest to light, often just requiring lights spaced along one or both walls.
- Winding or Curved Stairs: These require more careful planning to ensure even illumination around the curves, potentially needing more units or lights with wider beams.
- Open Risers vs. Closed Risers: Open risers (where you can see through the steps) might benefit from under-tread lighting, while closed risers often work best with wall-mounted options.
- Indoor vs. Outdoor Stairs: This is a critical distinction. Outdoor lights need to be weatherproof and often brighter. Indoor lights have more aesthetic flexibility. This article will focus primarily on indoor applications, but many principles apply to both.
- Stairs with Landings: Don’t forget to account for any landings or turns. These areas also need adequate lighting and sensor coverage.
Key Features to Consider: Making Smart Choices
Once you’ve got your “why” and “where” sorted, it’s time to dive into the technical details and design elements that differentiate one stair light from another.
Power Source: Wired, Battery, or Rechargeable?
This is often the first practical hurdle. Your existing electrical setup and willingness to undertake DIY or hire an electrician will guide this decision.
Wired Solutions
- Pros: Consistent power, no battery changes, often brighter, can be integrated into existing home electrical systems. Can support more sophisticated features or longer-lasting, higher-output LEDs.
- Cons: Requires electrical wiring, which can be complex and expensive if not already present. Might involve opening walls for installation. Less flexible in terms of placement after installation.
- Best For: New builds, major renovations, or if you already have existing wiring in suitable locations. Ideal for a permanent, robust lighting solution.
Battery-Operated Options
- Pros: Easiest installation (peel-and-stick, screws), no wiring required, highly flexible placement. Great for renters or temporary solutions.
- Cons: Requires regular battery replacement, which can be a nuisance and an ongoing cost. Light output might be lower to conserve battery life. Environmental impact of discarded batteries.
- Best For: Quick, easy upgrades, rental properties, areas where wiring is impossible or impractical, or if you prefer minimal installation effort. Look for models that use standard, easily accessible batteries (AA, AAA).
Rechargeable Lights
- Pros: Combines some of the flexibility of battery-operated with less waste. You recharge them periodically (via USB, for instance). Often brighter than standard battery models.
- Cons: Still requires removal and recharging, which can be inconvenient if you have many lights. Battery life varies significantly between models.
- Best For: Those who want battery flexibility but are willing to periodically take down lights for charging. A good middle-ground option.
Sensor Technology: How Smart is Smart?
The “sensor” part is what makes these lights so convenient. Understanding the types of sensors helps you pick one that responds how you want it to.
Passive Infrared (PIR) Sensors
- How They Work: PIR sensors detect changes in infrared radiation (heat) moving within their field of view. When a person walks past, their body heat triggers the sensor.
- Pros: Very common, generally reliable, energy-efficient (only activate when needed). Good for detecting general motion.
- Cons: Can be triggered by pets if mounted too low. Can sometimes have “dead spots” if not positioned well. May not activate if motion is extremely slow.
- Best For: Most standard stair lighting applications where you want the light to come on as soon as someone approaches.
Radar/Microwave Sensors
- How They Work: These sensors emit microwave signals and detect changes in the reflected signal, which indicates motion. They can detect through thin materials.
- Pros: More sensitive than PIR, can detect finer movements, and can sometimes “see” through certain non-metallic materials (like thin doors or walls, though not usually useful for stairs).
- Cons: Can be too sensitive, leading to false positives. Generally more expensive than PIR.
- Best For: Niche applications where PIR isn’t sensitive enough, but generally overkill for standard stair lighting.
Light-Sensitive (Dusk-to-Dawn) Sensors
- How They Work: These sensors measure ambient light levels. They only allow the motion sensor to activate when it’s dark enough.
- Pros: Prevents lights from coming on unnecessarily during the daytime, saving energy (especially for battery-powered units).
- Cons: None really, this is almost always a desirable feature to have in conjunction with a motion sensor.
- Best For: Any stair sensor light where you want to ensure it only operates when truly needed, usually included as a standard feature.
Light Output and Color Temperature: Setting the Mood and Visibility
This impacts both safety and aesthetics significantly. Don’t overlook these details.
Brightness (Lumens)
- What it is: Lumens measure the total amount of visible light produced by a source. More lumens mean brighter light.
- Considerations:
- Safety: You need enough lumens to clearly illuminate each step without creating harsh shadows or glare. A general guideline for stair safety is around 10-20 lumens per step, but this can vary based on light placement and desired effect. Multiple lower-lumen lights are often better than one very bright light.
- Ambiance: Too bright can feel clinical; too dim can still be unsafe. Aim for a comfortable, warm glow rather than a spotlight effect for general ambiance.
- Best For: Choosing based on your specific stairs. A long, dark staircase might need more lumens overall, distributed across several lights.
Color Temperature (Kelvin)
- What it is: Measured in Kelvin (K), this describes the “warmth” or “coolness” of the light.
- Warm White (2700K-3000K): Soft, yellowish light, similar to traditional incandescent bulbs. Creates a cozy, inviting atmosphere.
- Neutral White (3500K-4500K): Brighter, more natural white light. Good for visibility without being too harsh.
- Cool White/Daylight (5000K-6500K): Bluish-white light, similar to natural daylight or fluorescent lights. Can feel sterile but offers excellent clarity.
- Best For: Matching your home’s existing lighting and desired mood. For stairs, warm or neutral white is often preferred to maintain a residential feel and avoid harshness.
Design and Mounting Options: Blending In or Standing Out
The physical appearance and how the light attaches to your wall or step are crucial for both practicality and aesthetics.
Mounting Methods
- Adhesive Strips: Simplest to install, often on battery-powered units. Great for renters or temporary placement. Ensure the surface is clean and smooth for good adhesion.
- Screws/Hardware: More secure and permanent. Requires drilling, but provides a very stable mount. Usually for wired or heavier battery units.
- Magnetic Backs: Some lights come with magnetic backs that attach to an adhesive metal plate. This allows for easy removal for charging.
- Integrated into Step/Wall: For highly custom, wired solutions, lights can be flush-mounted directly into the wall or under the lip of a step. This is the most seamless but also the most complex.
Fixture Styles
- Strip Lights: Flexible LED strips can be adhered along the underside of a handrail, along the wall at baseboard height, or even under the lip of each step. Offers continuous, diffused light.
- Puck Lights: Small, circular lights that offer localized illumination. Can be strategically placed to highlight individual steps.
- Recessed Wall Lights: Flush-mounted into the wall, providing a sleek, modern look. Often wired.
- Step Lights: Designed specifically to be mounted on or near individual steps, often angled downward.
Aesthetics and Materials
- Material: Look for durable materials like aluminum, ABS plastic, or stainless steel. Finish options (brushed metal, matte black, white) should match your home’s decor.
- Size and Profile: Consider how prominent you want the lights to be. Slim, low-profile designs often blend in best.
- Diffusers: A good diffuser (the cover over the LED array) will spread the light evenly and reduce glare. Frosted diffusers are common for this purpose.
Smart Features: Beyond Basic Motion Detection
For those looking for more control and integration, some stair lights offer advanced “smart” capabilities.
Adjustable Settings
- Delay Timer: How long the light stays on after motion is no longer detected (e.g., 15 seconds, 30 seconds, 60 seconds). Crucial for preventing lights from turning off too quickly while you’re still on the stairs.
- Brightness Levels: Some lights allow you to adjust the lumen output, great for fine-tuning ambiance or saving battery.
- Sensor Sensitivity: The ability to adjust how easily the motion sensor is triggered. Useful for avoiding pets setting off the lights.
Smart Home Integration
- Zigbee/Z-Wave/Wi-Fi Compatibility: Lights that can connect to your existing smart home hub (like SmartThings, Home Assistant, Google Home, Alexa) allow for greater control.
- Custom Automations: This is where smart integration shines. You could program lights to:
- Only come on at specific times.
- Trigger other lights in your home when activated.
- Adjust brightness based on time of day.
- Be controlled remotely via an app.
- Considerations: This adds complexity and often cost. Ensure compatibility with your existing smart home ecosystem if this is important to you.
Installation and Placement Strategies
Getting the lights in the right spot and set up correctly is just as important as choosing the right product. Poor placement can negate even the best features.
Where to Put Them: Strategic Positioning for Safety and Style
The goal is even illumination without glare, guiding the eye down each step.
Wall-Mounted Options
- Height: Generally mounted low, often around 6-12 inches above the step edge, or at baseboard height. This illuminates the steps directly without casting long shadows from the railing or a person.
- Spacing: Depending on brightness, lights might be every 2-3 steps, or every step for a more pronounced effect. On straight stairs, alternating sides can work well.
- Corners/Landings: Ensure extra lights or wider beam angles cover turns and landings.
- Sensor Placement: The sensor needs an unobstructed view of the approaching area. Mount it where it can detect motion before someone is already on the first step.
Under-Tread Lighting
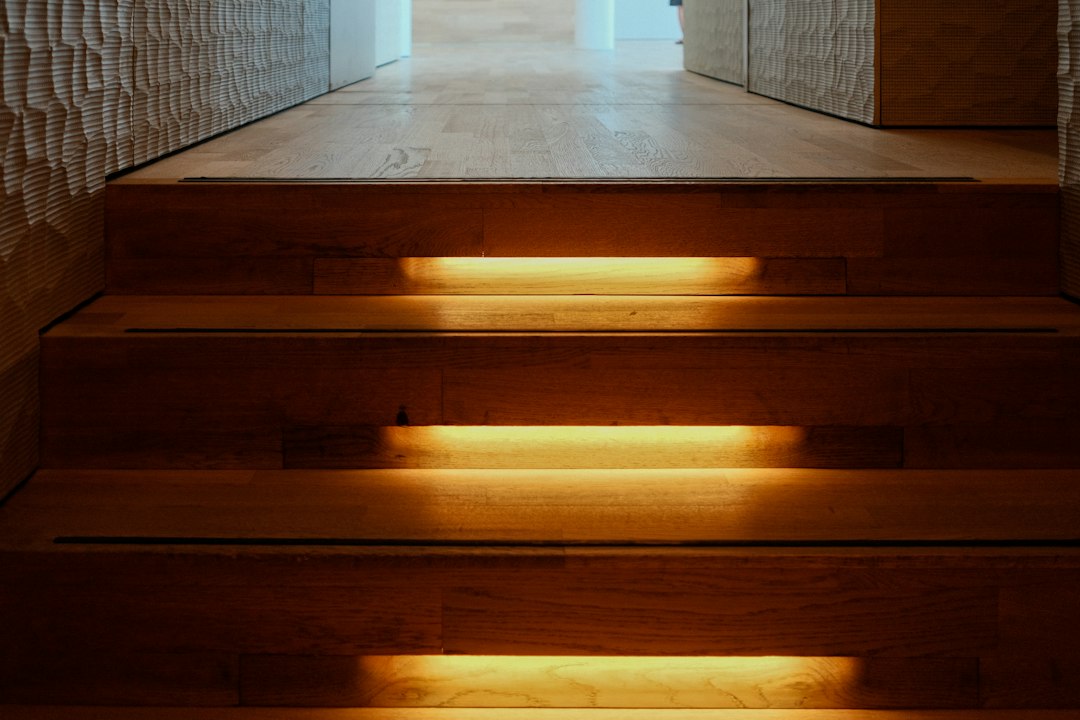
- Effect: Creates a dramatic, floating effect and clearly defines each step. Works best with open-riser stairs or steps with an overhang.
- Installation: LED strips are usually installed on the underside of the step, facing downwards or slightly angled towards the riser below.
- Wiring: Can be more complex to hide wiring for individual strips.
- Sensor: A single sensor at the top and bottom of the stairs can trigger all lights simultaneously.
Handrail Integration
- Effect: Discreet and elegant. LED strips can be routed into the underside of the handrail, providing diffused light along the path.
- Considerations: Often requires custom installation or a specific handrail design.
Sensor Range and Angle: Avoiding Misses and False Alarms
This is about fine-tuning how your lights respond to presence.
- Adjustable Angle: Some sensors allow you to tilt or swivel them, which is useful for focusing the detection area.
- Sensitivity Settings: If your lights have them, adjust sensitivity to avoid pets setting them off. Mounting higher up can also help with this.
- Overlapping Coverage: For long staircases, consider placing sensors at both the top and bottom, or multiple sensors along the path, to ensure continuous activation as someone descends or ascends. You don’t want the lights to turn off mid-way.
Installation Tips for Different Power Types
A few practical pointers to make the setup smoother.
Battery-Powered
- Clean Surface: For adhesive mounts, thoroughly clean the surface with rubbing alcohol and let it dry before applying.
- Test Placement: Before permanently sticking or screwing, hold the light in place and test the sensor’s range and illumination. Walk up and down to check for dead spots.
- Battery Type: Stick to recommended battery types. Rechargeable AA/AAA batteries can save money and reduce waste over time.
Wired Solutions
- Safety First: If you’re not comfortable with electrical work, hire a qualified electrician.
- Plan Wiring Routes: Think about how the wires will be hidden (inside walls, under trim, through conduit). This is critical for aesthetics and safety.
- Transformer Placement: Low-voltage LED systems will require a transformer. Plan for a discreet and accessible location for this unit.
Troubleshooting Common Issues
Even the best products can have quirks. Knowing how to address common problems can save you frustration.
Lights Not Turning On
- Check Power: Is it plugged in? Are batteries dead or installed correctly? For wired systems, check the circuit breaker.
- Ambient Light: Is the area too bright? The dusk-to-dawn sensor might be preventing activation.
- Sensor Blocked: Is something physically obstructing the sensor’s view? (e.g., furniture, a plant, a hanging coat).
- Motion Too Slow: Very slow, deliberate motion sometimes doesn’t trigger PIR sensors. Try moving normally.
- Sensor Malfunction: Rarely, the sensor itself might be faulty.
Lights Turning On Randomly (False Positives)
- Pets: Is a pet triggering the sensor? Try mounting the light higher or adjusting sensitivity if available.
- Drafts/Heat Sources: PIR sensors can be triggered by sudden temperature changes. Is there a draft, a heat vent, or direct sunlight hitting the sensor?
- Reflective Surfaces: Shiny surfaces can sometimes cause issues.
- Sensor Sensitivity: If adjustable, reduce the sensitivity.
Lights Not Staying On Long Enough
- Delay Timer Setting: Check if the delay timer can be adjusted. Many units have a fixed duration (e.g., 15-30 seconds).
- Sensor Range: Are you moving out of the sensor’s range too quickly? You might need to adjust placement or add another light.
- Interference: External factors might be briefly blocking the sensor, causing it to reset.
Inconsistent Brightness
- Battery Life: For battery units, dimming often indicates low battery.
- Power Fluctuation: For wired units, this could indicate an electrical issue.
- Faulty Unit: If all else fails, the light unit itself might be defective.
Maintaining Your Stair Sensor Lights
A little care goes a long way in ensuring your lights work reliably and look good for years to come.
Cleaning and Care
- Dust Removal: Dust on the sensor can reduce its effectiveness. Gently wipe sensors and light covers with a soft, dry cloth regularly.
- Avoid Harsh Chemicals: Use only mild cleaners if wiping down the fixture, especially on plastic or painted surfaces, to prevent damage or discoloration.
- Check Connections: For wired units, periodically ensure connections are secure (if safely accessible).
Battery Management
- Scheduled Replacement: For battery-operated lights, consider replacing all batteries at a set interval (e.g., every 3-6 months) rather than waiting for them to die. This helps maintain consistent brightness and prevents unexpected darkness.
- Rechargeable Care: If using rechargeable units, follow the manufacturer’s guidelines for charging cycles to prolong battery life. Avoid letting them completely discharge repeatedly.
- Quality Batteries: Invest in good quality batteries; they tend to last longer and perform better.
Firmware Updates (Smart Lights)
- Stay Current: For smart lights, regularly check for firmware updates through their respective apps. These updates can improve performance, add features, and fix bugs, including sensor reliability.
- Maintain Connectivity: Ensure your smart lights maintain a stable connection to your Wi-Fi or smart hub to receive updates and function correctly.
Ultimately, choosing the best stair sensor light involves a thoughtful balance between the practical demands of safety and the aesthetic desires for your home. By considering your specific needs, diving into the features, planning your installation, and knowing how to troubleshoot, you can create a safer, more inviting, and stylish staircase that you’ll appreciate every day.